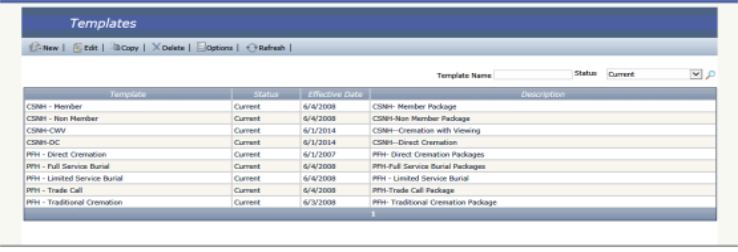
Templates
Overview
The Template feature allows the selection of Sections , Categories and Line Items for a contract type. A template is built to meet the specification of the contract.
This screen can be accessed from the Menu bar by navigating to Administration – Templates.
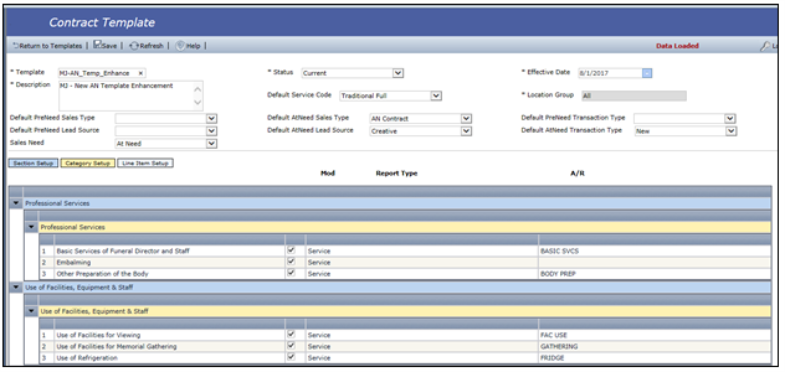
Contract Template
A Contract Template is a predefined contract format, including all the services and merchandise that might be selected for a contract of that type. It also allows you to define default values for the contract in areas such as sales type, transaction type and lead source. The building blocks of a Template are Section, Category, and Line Item. Sections are the primary divisions of a contract. Sections contain categories; categories contain line items.
Building a Contract Template is simply the process of selecting all the sections, categories, and line items and determining the order in which they will print on a contract. An Option determines which line items will be automatically selected (checked) for a new contract. An option may include contract-level discounts.
To place a contract on a case, a user must select a Template and an Option. An option can only be used by facility locations which have been granted access.
Workflow
To add a New Template:
1. Navigate to Administration – Templates screen
2. Click New
3. Fill in the required fields within top half of screen
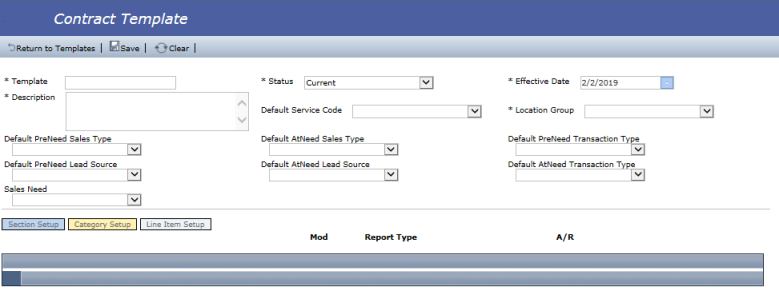
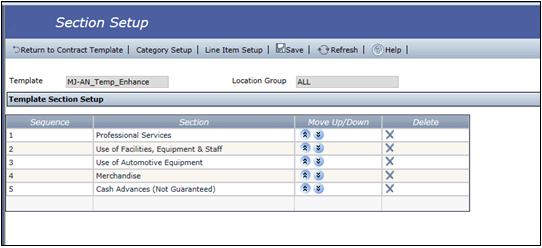
4. Click on ‘Section Setup’ button
- If this is a new template, a blank row will appear on the grid.
5. Click within the Section column and select a Section
- IMPORTANT: Tab over until a new row is added and continue entering sections
6. Enter all necessary Sections and Click Save
- Once screen is saved, sections can be moved up or down and/or deleted.
7. Click on ‘Category Setup’ button
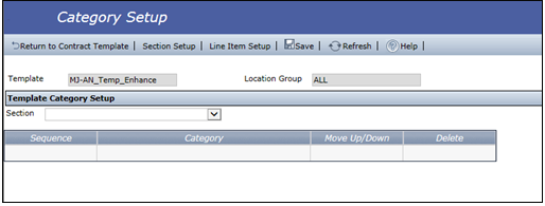
8. Select a Section from dropdown box
9. Click within the Category column and select a Category to add to Section
- IMPORTANT: Tab over till a new row is added and continue entering sections
10. Click Save
- Once screen is saved, Categories can be moved up or down and/or deleted.
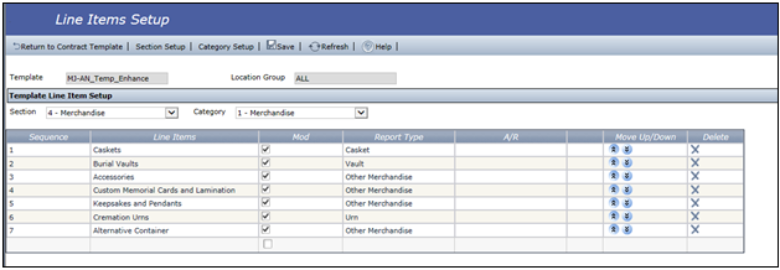
11. Click ‘Line Item Setup’ button
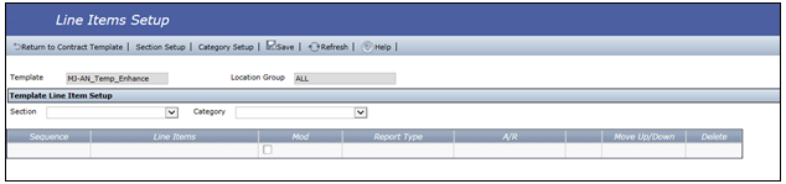
12. Select a Section and Category from dropdown lists
13. Click within the Line Items column and select an item
14. Tab Over to Mod and Report Type columns, making necessary selections
- If Line Item is Merchandise/Pick List/Property subline types, then press tab in ‘A/R’ textbox and new line item will be added on grid.
- If Line Item is NOT Merchandise/Pick List/Property subline types, then press tab in and ‘A/R’ code selection window will appear. Select the code and the code will appear in A/R column.
15. Click Save
- Once the screen is saved, Line Items can be moved up or down and/or deleted.
16. Once completed, click on ‘Return to Contract Template’ button & the template should be filled in with all Sections, Categories and Line items
Notes:
- Within the Contract Template screen, if the Section item row is double clicked, system will navigate to the Category Setup for that Section.
- Within the Contract Template screen, if the Category item row is double clicked, system will navigate to the Line Item Setup for that Category.